Scraping mobile app API
This article is written by Lukas Prokein, frontend engineer at Thinknum. We started crawling the web in 2014, and to-date have aggregated alternative data on 500,000 companies worldwide. Our users (300+ investment firms, hedge funds, internet companies and more) access these datasets via UI and an API.
If you’re interested in data engineering work check out Thinknum’s career page for our open positions (remote and based in NYC).
In this blog post I'll go through the process of creating a scraper for the REST API used by a food delivery mobile app, when there's no web interface available. I'll take a closer look at each step, from reading app HTTP requests, to building and signing your own requests.
Read app HTTP requests
First step is to check what HTTP requests are being made from mobile app and whether we can see their content. The tool I'm using is Charles Proxy. Most of the apps now use HTTPS, so in order to see the content of request, I need to enable SSL proxy in Charles and have Charles SSL Certificate installed on tracked mobile device.

On the screenshot above, I can see various API requests that our target app makes when being used. Next step is to see, if I can replicate those and which parts of the request are mandatory.
To do that I use Paw. I can export a request from Charles by right clicking on it, and selecting Copy cURL Request. Then in Paw select File/Import/Text and paste the cURL. Now I can try editing request to see, which parts of body and headers are mandatory for request to be successful.

In this case headers Nonce, Timestamp, Accesskey and Sign are all required. If any one of those is missing, or invalid, the request fails.

On the screenshot below I can see the comparison of those headers in two separate requests. I can see that all values except for Accesskey are changing. This means I won't be able to construct and call requests on my own, without knowing how to generate valid values for those headers. And in order to do that, I need to know the source code.

Reading source code
Some applications were already decompiled by someone else, which means that the first step to finding source code should be just looking on the internet, especially searching on GitHub.
In this case there was no trace of source available anywhere. So I needed to get it on my own. First, I need to get the APK for Android app. There are many websites hosting APKs so I just found one I liked and got the APK file.
I used tool jadx to decompile the APK. I should be able to see various packages and Java classes and decompiled code. But what I can see on the screenshot below, is way too few packages and classes. By searching for keywords "qihoo" and "jiagu" which are appearing in the decompiled code, I can find out that this app is using 360 reinforcement to protect from decompiling. Good news is, that there are already tools to pass this reinforcement.

DEX dumping
For these next steps I need a physical Android device which is rooted and has a few more perks installed.
I am using Samsung Galaxy S7 running official Android 8.0 with TWRP recovery flashed. It is rooted with Magisk and has Xposed modding framework installed.
What I want to do next, is to extract application DEX files during runtime. A DEX file is a compiled Android application binary. Those binaries should contain the actual code for application which is encapsulated inside 360 reinforcement. There are multiple Xposed plugins for extracting DEX files, but I prefer using mod called DeveloperHelper which has the DEX dumping functionality built in. Unfortunately in this case this mod was not able to extract DEX files correctly and target app kept crashing.
Good news is, that there's another reverse-engineering toolkit I can try, called Frida. There are two ways of running code injection using Frida. First option is running code using frida-inject binary directly on Android device. Second option is, which I used, launching frida-server binary on device and then executing commands using client on macOS. Furthermore there is a Python app called FRIDA-DEXDump which has all the DEX extraction Javascript for Frida already built-in.
After executing FRIDA-DEXDump on my target app there is a folder with multiple DEX files.


Decompiling DEX files
I can use jadx again to open and decompile dumped DEX files. All source code is divided between those files. Sometimes it is possible to open all of them in jadx at once but this time it wasn't working because of some conflicts. So I tried opening them one by one and write down notes about which part of the source code is in each file. This way I was able to find 2 DEX files that were important for my use case.
After some time searching through the source, I found the code responsible for building and signing HTTP requests.

Now I need to read through it, and try to replicate it in my own code. The key is to figure out how Nonce, TimeStamp and Sign headers are created. On line 4 I can see that Timestamp is just current time in milliseconds when request is created. On line 5 I can see that Nonce is just random UUID generated for each request.
The most difficult part to read was the Sign header. I can see how the header is built on line 25:
hashMap.put("sign", HttpManager.this.pixelUtil.c(arrayList));But I need to figure out what does the method called c do and what is the content of arrayList variable. Note that many of the variable and method names are shortened in decompiled code so it is harder to navigate through them. I can make it a bit easier by running Tools/Deobfuscation.
import com.util.PixelUtil;
import java.util.ArrayList;
import java.util.Collections;
import java.util.HashMap;
import java.util.UUID;
import okhttp3.Interceptor;
import okhttp3.Request;
import okhttp3.Response;

public class HttpManager extends AbstractBaseServiceClient {
    PixelUtil pixelUtil = new PixelUtil();

    public class C0045a implements Interceptor {
        C0045a() {
        }

        @Override // okhttp3.Interceptor
        public Response intercept(Interceptor.AbstractC3758a aVar) {
            Request request = aVar.request();

            HashMap hashMap = new HashMap();
            hashMap.put("timestamp", String.valueOf(System.currentTimeMillis())); // OK
            hashMap.put("nonce", UUID.randomUUID().toString()); // OK
            hashMap.put("accessKey", ((AbstractBaseServiceClient) HttpManager.this).oauthProvider.getOAuthClient().appKey); // OK

            ArrayList arrayList = new ArrayList(hashMap.values());
            arrayList.add(request.mo29821g());
            String sVar = request.mo29823i().toString();
            arrayList.add(sVar.substring(sVar.indexOf(47, request.mo29823i().mo29757H().length() + 3)));
            arrayList.add(((AbstractBaseServiceClient) HttpManager.this).oauthProvider.getOAuthClient().appSecret);

            Collections.sort(arrayList);
            hashMap.put("sign", HttpManager.this.pixelUtil.mo21640c(arrayList));
        }
    }
}
I can see that arrayList contains values of timestamp, nonce, accessKey. To find out the value of request.mo29821g(), which is added to the list, I need to look at okhttp3.Request class code:
public String mo29821g() {
    return this.f8764b;
}
From the snippet above, I can see that the method only returns value of property f8764b.
/* renamed from: okhttp3.x */
public final class Request {

    /* renamed from: a */
    final HttpUrl f8763a;

    /* renamed from: b */
    final String f8764b;

    /* renamed from: c */
    final Headers f8765c;
    @Nullable

    /* renamed from: d */
    final RequestBody f8766d;
}
By comparing the decompiled code to okhttp library code on GitHub, I found that this property represents request method so it has value GET, POST, etc. which is added to the arrayList.
Using similar approach I found out that method request.mo29823i() returns request URL which is stored in sVar variable. The next line then transforms this URL by removing protocol and domain leaving only relative part of the URL which is then added to arrayList.
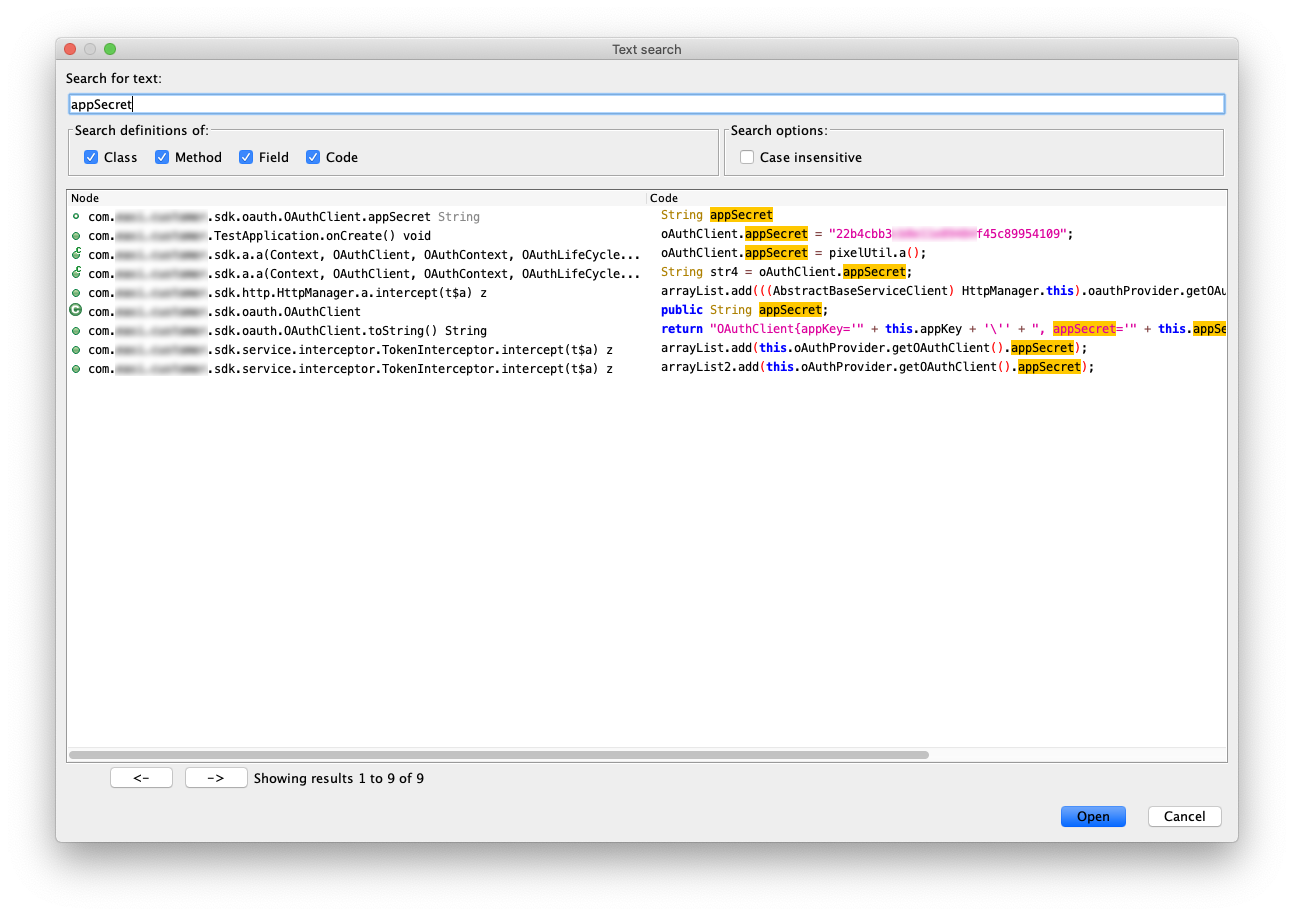
Next thing added to list is appSecret value. Luckily I was able to find its value by searching in code.

After that, the array is sorted and pushed to the pixelUtil.mo21640c method. Now I need to figure out what this method does with it.
package com.util;

import android.text.TextUtils;
import java.util.List;

public class PixelUtil {
    static {
        System.loadLibrary("pixel");
    }

    /* renamed from: a */
    public String mo21638a() {
        return calc2();
    }

    /* renamed from: b */
    public String mo21639b() {
        return calc1();
    }

    /* renamed from: c */
    public String mo21640c(List<String> list) {
        String[] strArr = new String[list.size()];
        list.toArray(strArr);
        String calc_list_string = calc_list_string(strArr);
        return TextUtils.isEmpty(calc_list_string) ? "" : calc_list_string.toUpperCase();
    }

    public native String calc1();

    public native String calc2();

    public native String calc_list_string(String[] strArr);
}
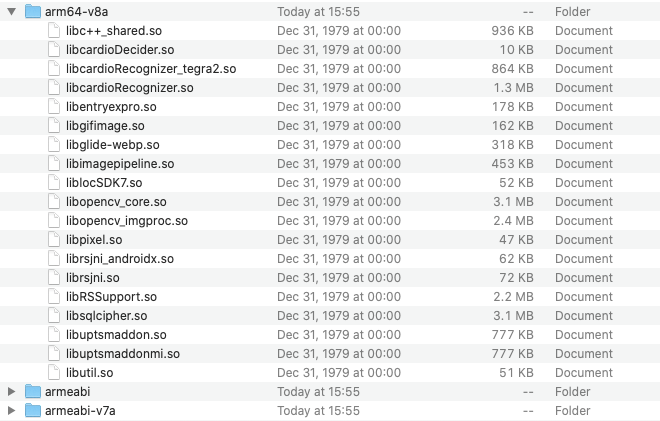
The snippet above is the PixelUtil class. I can see that the method mo21640c takes the list, converts it to array, and then pushes it to method calc_list_string. The method definition is missing and that is because this method is calling same named function from native library called pixel which is being loaded on runtime using System.loadLibrary() at the beginning of the class. This libpixel.so library can be found in a lib folder inside the APK.

It seems that this is their own crypto library they share between platforms because I did not find any information about it on the internet. Disassembling such precompiled library would be too difficult for my use case. Let me use it instead.
Bridging precompiled Android native library
I have one problem. APK only contains libraries compiled for 32 and 64-bit ARM platforms and no x86 platform. This means that this library can be only used on ARM device.
One solution would be to create my own Android app which will use libpixel native library to sign requests and run this app inside Android Emulator. But ARM emulator is too slow and I don't need the whole Android operating system running.
But then I found a project called unidbg which enables me to emulate Android native library with ARM ABI which is exactly what I need. In this case the sign method looked like this:
public String sign(String[] array) {
    Arrays.sort(array);
    DvmObject<?> result = cUtilities.callStaticJniMethodObject(emulator, "calc_1list_1string([Ljava/lang/String;)Ljava/lang/String;", vm.addLocalObject(ArrayObject.newStringArray(vm, array)));
    String signValue = (String) result.getValue();
    return signValue.toUpperCase();
}
What this does, is it calls the native calc_list_string method from included libpixel library with my provided input array and returns the result. The weird looking string calc_1list_1string([Ljava/lang/String;)Ljava/lang/String; in the callStaticJniMethodObject method parameter is the JNI (Java Native Interface) way of writing method signature - in this case it represents method called calc_list_string with one input parameter of type array of objects of type String and output of type String. It took me some time to figure out that _ symbols in method name needs to be escaped with character 1 before them.
The last thing I needed, was a way to use this Java signing method from Python code, as our scrapers are mainly written in Python. Here comes the handy Py4J library, which provides a way to connect Python and Java applications with only few lines of code instead of using some big Java REST framework.
Conclusion
Finding a way to use closed API in your own code can be tricky. Every time you solve one obstacle another one pops up. But there are many useful tools and resources out there which you can use to find your way through it. With every new reinforcement, there is a new tool to crack it. You just need to know what you're looking for.
Check out the full list of 35+ datasets that we have indexed from the public web by using techniques outlined in this article.
If you are interested in adopting alternative data for your investment, research, or business intelligence strategy, request a demo here.